Interview Rooms let you host live interviews and focus groups directly in Voxpopme. This guide covers the full workflow — from creating a room and scheduling sessions to managing participants during a live interview.
Setting Up an Interview Room
- From your dashboard, select Start from template.
- Choose Create an Interview Room from the popular templates.
- Enter a room name (this will be visible to participants).
- Optionally add the interview objective and expected duration.
- The system generates three unique links: one each for moderators, participants, and observers.
Scheduling Interviews
You can schedule sessions using your existing calendar tools. If you use the Voxpopme panel through HubUX, add the participant link during project setup. Moderator and observer links should be distributed separately via email.
Starting the Interview Room
Moderators
Enter your name and email, check audio and video settings, and enable automatic recording if required. Participants will wait in a holding room until you admit them.
Participants
Provide your credentials, verify your connection, and wait in the holding room until the moderator grants access.
Observers
Enter your name only. Observers gain immediate access to the room, remain invisible to participants, and can communicate with the moderator via the chat panel.
During the Interview
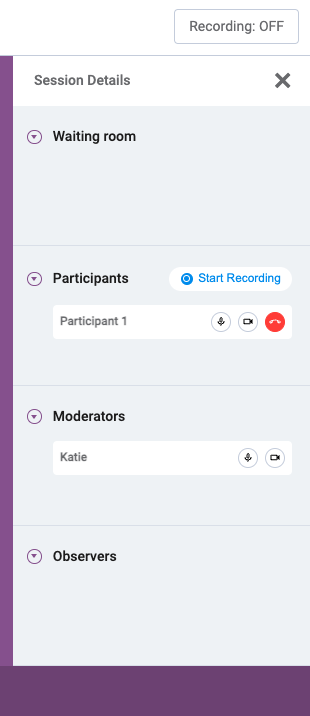
Moderator Controls
- Mute or unmute participants
- Manage participant cameras
- Start, pause, or stop recording
- Share your screen
- Use the chat function to communicate with observers
Participant Controls
- Toggle camera and microphone on or off
- Share their screen when prompted
- Send messages via chat
Observer Capabilities
Observers can watch and listen to the session without being seen or heard by participants. Their only means of communication is the chat panel, which is visible only to the moderator.